First, A Personal Introduction
Hello everyone! My name is Snaxalot, and I’m happy to introduce myself to you as the second dev on Automation Station! This is my first time working professionally on a game. For the past decade, my career has been focused on frontend web development for SaaS applications, advertising tracking, and video streaming. Most recently, I was working at Hulu and Disney+ in the video player space for their smart TV applications (think player controls, tv guide, subtitles and such). When it comes to games, I’ve mostly just been a rabid player of them. I started playing as soon as I was old enough to sit on my Dad’s lap, ordering his armies around in Conquest of the New World with loud, incoherent gestures like a small, drunk Napoleon. Since then, gaming has never stopped being a huge part of my life.
My game development experience however has been far more limited. Sure, I’ve been known to scribble out a quick disjointed game design doc – those usually fail to capture the full richness of my imagination; at least they satisfy the momentary creative urges – but those ideas have never made it off the page (yet!). Until now, I haven’t had the opportunity to dive into the world of game dev. I’m excited to see what its all about, to see where the reality lies between its reputation and its promise of passionate fulfillment. With my old job in the rear view, I’m looking forward to giving game dev a real shot.
As a close friend of Scott’s, I’ve been following Automation Station since its inception as a conveyor belt blockage math problem, feverishly being discussed in the backchannels of Discord by a few heady nerds between binge sessions of Factorio and Rocket League. Who knew what some ASCII would turn into years later?
Automation Station has come a long way since then, and I’m excited to be joining Scott in trying to make the best cozy automation game we possibly can.
With that out of the way, let’s dive into a couple new features I’ve been working on.
A Living World
One question I think about often when judging the quality of a game is “How does this game make the player feel”? In my experience, if I’m not feeling anything while playing a game, that apathy is going to lead to me setting the game down, likely forever. The best games are real works of art: they evoke emotion. They make people throw controllers through their TV screens in a way a painting never could. They fill players with pride over their achievements. They soothe the anxiety of long, stressful days. And the game developer as an artist has to be mindful of what they’re creating and what emotions they are evoking. When I’ve shown Automation Station to people for the first time, they’ll see boxbot and the squishy blubber trees and they’ll squeal with joy over the aesthetic, even though they know nothing of what the game entails. That visceral, emotional reaction of cute-safe-joy, of oh-my-god-look-at-that-lil-guy, that reaction is exactly what a cozy game should aim for. That engagement with the living world that the player is stepping into is something I wanted to build upon for my first contributions to the game.
So I made a butterfly:
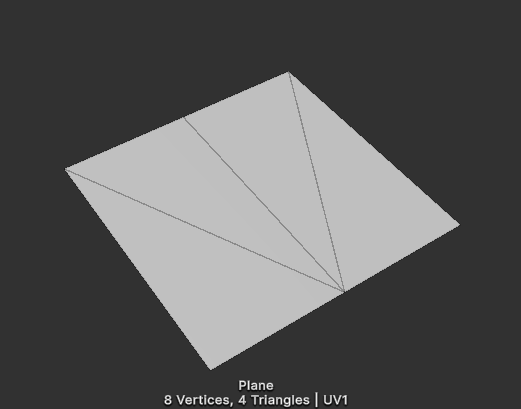
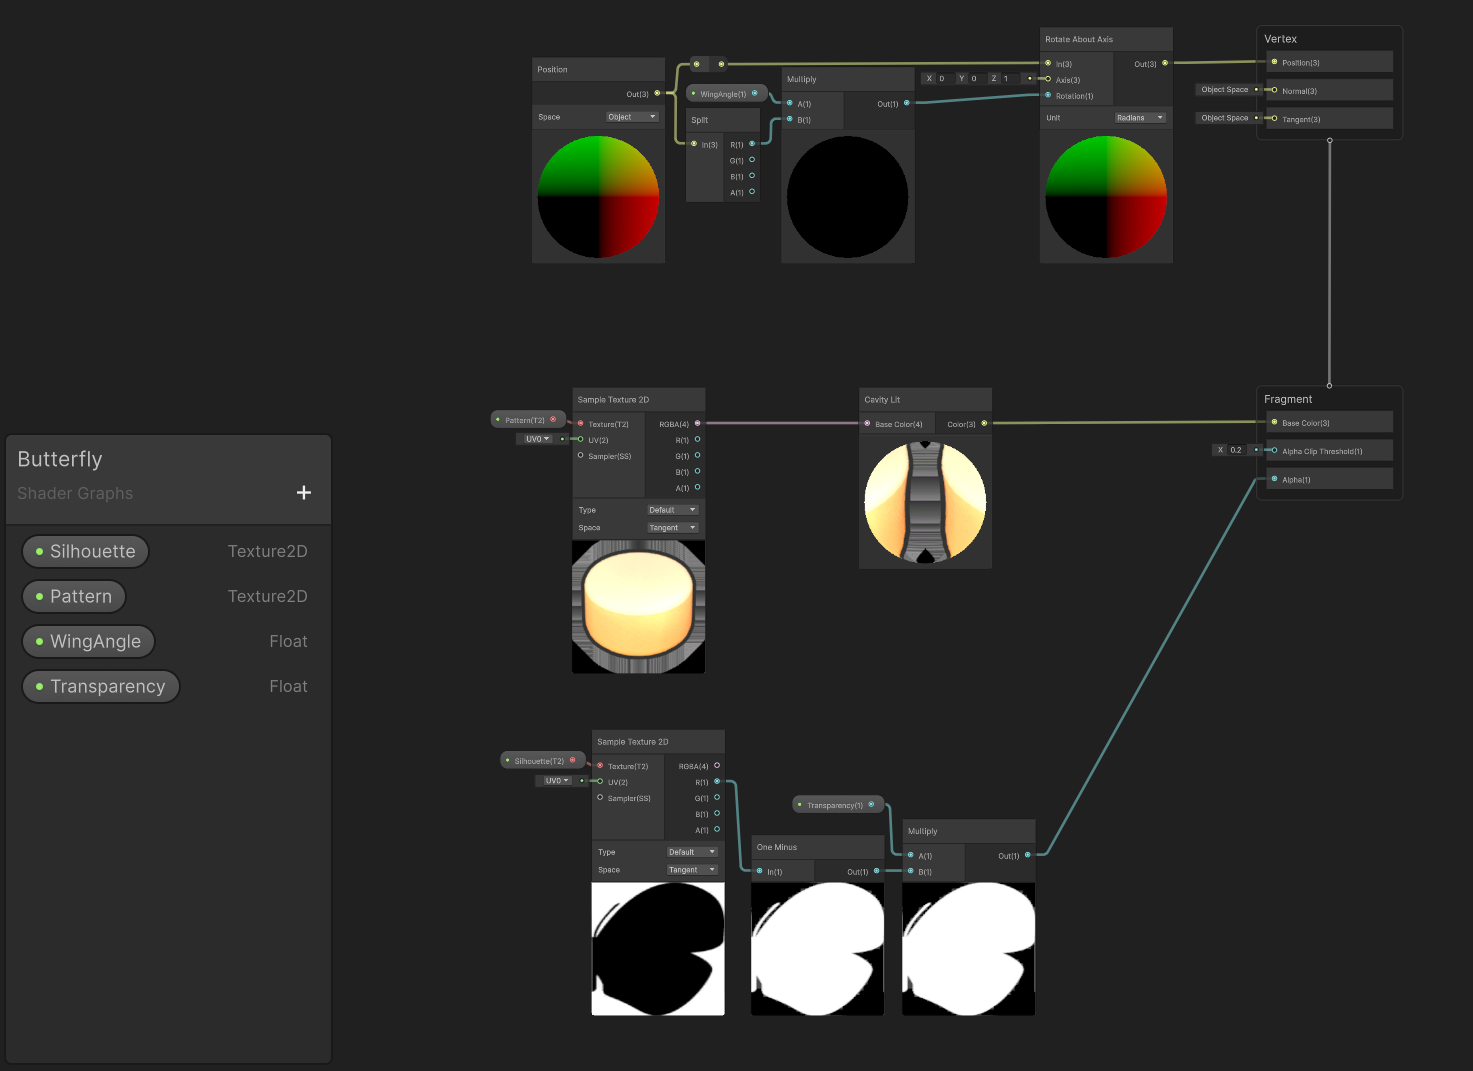
I figured something small like a butterfly would be a great first step in learning some basics about game dev, like how to make models, materials and apply those to game objects. Dipping my toes in ended up turning into a deep dive on Shader Graph, a quick bootcamp on how things are connected in Unity, re-learning some algebra, and watching dozens of butterfly videos on youtube.
With guidance from Scott, I started on a simple plan:
- Make a model in Blender that represented two flat halves of a butterfly, with the UVs mirrored.
- Use a shader in Unity to apply a texture to half of the butterfly and cut out the silhouette. This gets mirrored by the UVs on the model.
- Use that same shader to apply the wing angle as a rotation to each quad to move the butterfly’s wings.
- Move the transforms of those quads around to mimic a butterfly’s sinusoidal flying movement.
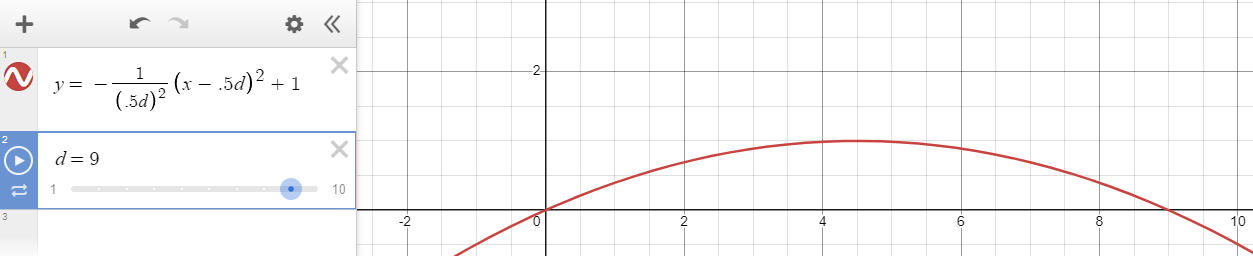
After getting the model and textures I needed into the game, a quick seminar on DOTS and ECS from Scott got me up to speed on the code I would need to write in order to get my butterfly fluttering. With some help from the fantastic graphing calculator website Desmos, I was able to figure out an equation for calculating the path the butterflies would take from one landing zone to the next. Add in some code to oscillate the butterfly’s position along that path, control how fast and to what degree they move their wings, pick new targets once they reach their destination, and to relax a bit before taking off and voila, you’ve got yourself a decent looking butterfly!
Now.. how are these things going to spawn?
Time of Day
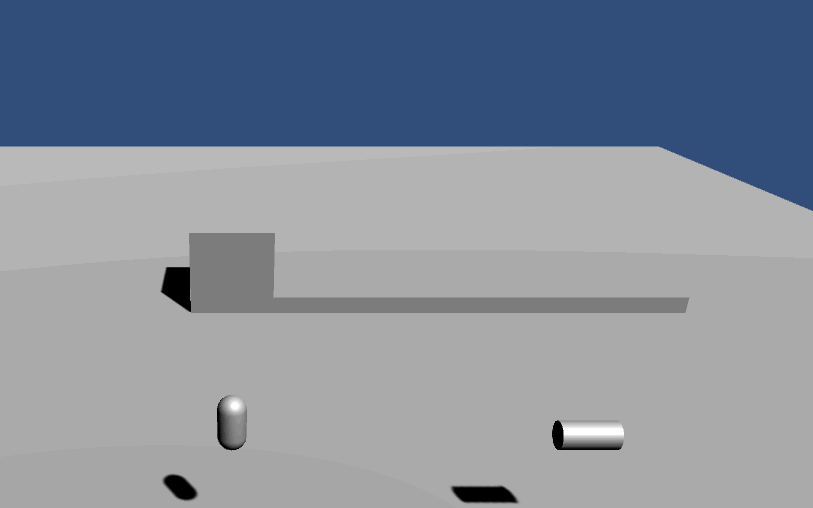
I’m a lucky guy; I live near one of the largest public parks in Seattle, one with a gorgeous view across the Puget Sound where you can watch the sun set behind the Olympic Mountains as it shines brilliantly off the water. I regularly go for walks through the park and one thing that always strikes me is how different the park can feel depending on the time of day. In the morning, robins and jays call out non-stop, the squirrels scurry to and fro looking for snacks, all while the trees and ferns perk up to bask in the sun. At dusk, rabbits emerge from their dens to forage while the crows stop their murderous cawing, tucking into their nests for the night. There’s an entire ecosystem going about its day-to-day without a care in the world for the dog-walkers and bird-watchers. That’s the kind of feeling I also want to capture in Automation Station when it comes to the flora and fauna. They’ll just keep going about their business unless you bother them.
Implementing time of day was rather straightforward. Every tick you increment a clock until its time to roll over to a new day. Simple! Then you get to the decisions around how many ticks you want in a day, when day becomes night, and what effect the time has on everything else. Hmmmm. To answer the first few questions, I dug into examples from other games. Here’s a list of what I found:
Length of Day

Factorio: 416s (6.9min)
Don't Starve Together: 8 mins (30s per segment)
Astroneer: 13 mins
Stardew Valley: 14m20s for 20hr (10m/7s)
Minecraft: 20 minutes.
Tears of the Kingdom: 24 minutes
Terraria: 24 minutes (15 day)
GTA 5, RDR2, Dragon’s Dogma: 48 minutes.
Satisfactory: 50 min (45min day)
Elden Ring, Dying Light 2: 60 minutes.
Final Fantasy XIV: 70 minutes.
Skyrim: 72 minutes.
Witcher 3: 96 minutes.
Cyberpunk: 180 minutes
I noticed that open world RPGs had day lengths that meant the player would only see a few cycles at most in a given play session, whereas survivalcraft and automation games that incorporated time of day based mechanics had far shorter cycles. Scott and I discussed at length what the player might be doing in day vs night scenarios and what effect the time of day might have on gameplay. We landed on a 12 minute day/night schedule broken down into an 8 minute day and a 4 minute night. I set to work quickly changing the angle of the game’s light gradually as time passed and tuning the color and intensity to mimic a moon during night. What I ended up with wasn’t bad, but Scott’s sharp eye was quick to catch that something was off. The feeling of the slow transition didn’t click with the discrete nature of the game’s other systems, it made it hard for the player to answer at certain points “is it day or is it night?”, and the environmental light’s shifting wasn’t as dramatic or engaging as I had hoped it’d be. As a remedy for these problems, Scott suggested we should try for a more stylized transition, one that moves through sunrise and sunset rapidly and grabs the players attention. Here’s the first draft of what that looks like:
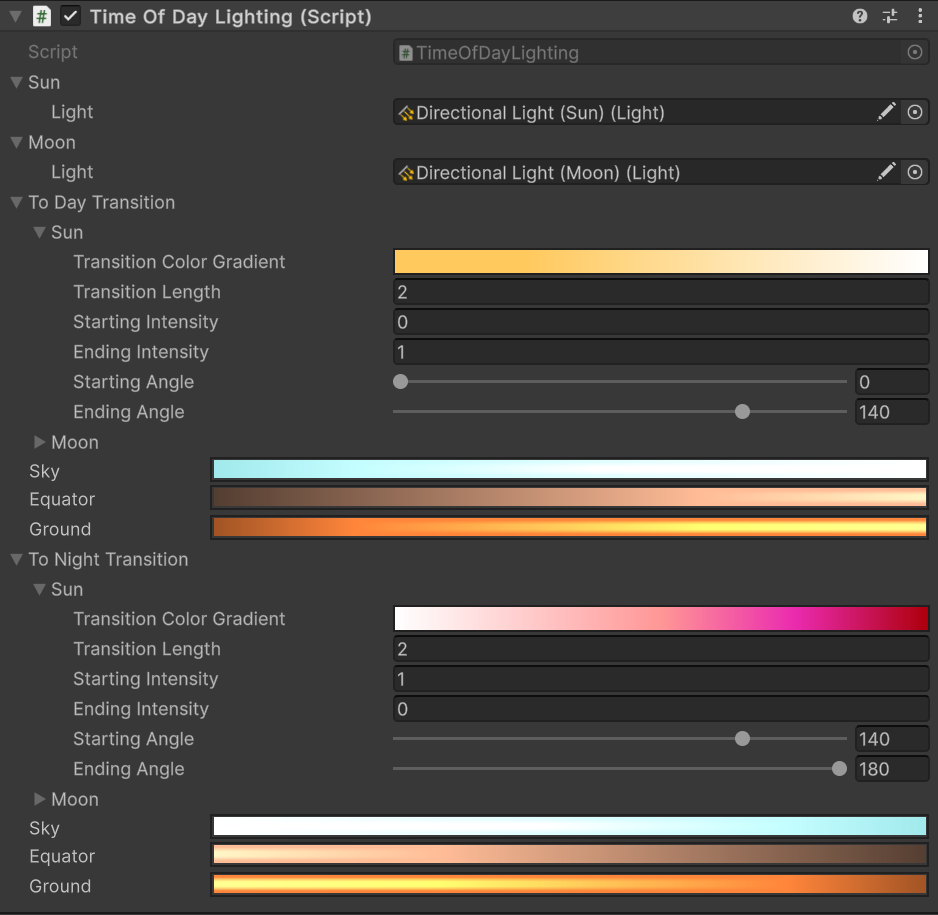
Implementing time of day was also a good opportunity to learn firsthand how to make a better authoring experience. Initially, the angle, color and light intensity transitions were based on AnimationCurve properties that had to be very particularly set to correspond with the time of day and match eachother. This setup was super easy to make mistakes on, causing jarring lighting changes if even one point on the end of any curve was in the wrong spot. After a quick refactor that placed the authoring experience as a higher priority than code simplicity, I came up with something that’s much easier to fiddle with and abstracts the time of day proportions and math out of the designer’s mind. There is still a lot of work to be done on the color selection for the transitions, but hopefully this kind of authoring control will allow us to more quickly get to a better state.
Conclusion
It’s been a big learning experience so far, and I’ve needed help from Scott almost every step of the way (thank you Scott!), but I’m excited to already be contributing and sharing some new features of the game with you! Thanks for taking the time to check this dev log out and for your continued support of Automation Station.
Take care!
Snaxalot
Changelog:
- Added TimeOfDay and TimeOfDayLighting systems
- Added rapid lighting transition at sunrise and sunset times
- Added transition gradients for ambient lighting (ground, equator, and sky)
- Added prefabs for butterfly, monarch butterfly, yellow butterfly
- Changed bush prefab to include butterfly landing zones
- Added texture for butterflies and a butterfly shader that uses a calculated wing angle
- Added spawning and despawning behavior for butterflies based on time of day
- Fixed crash on item drop
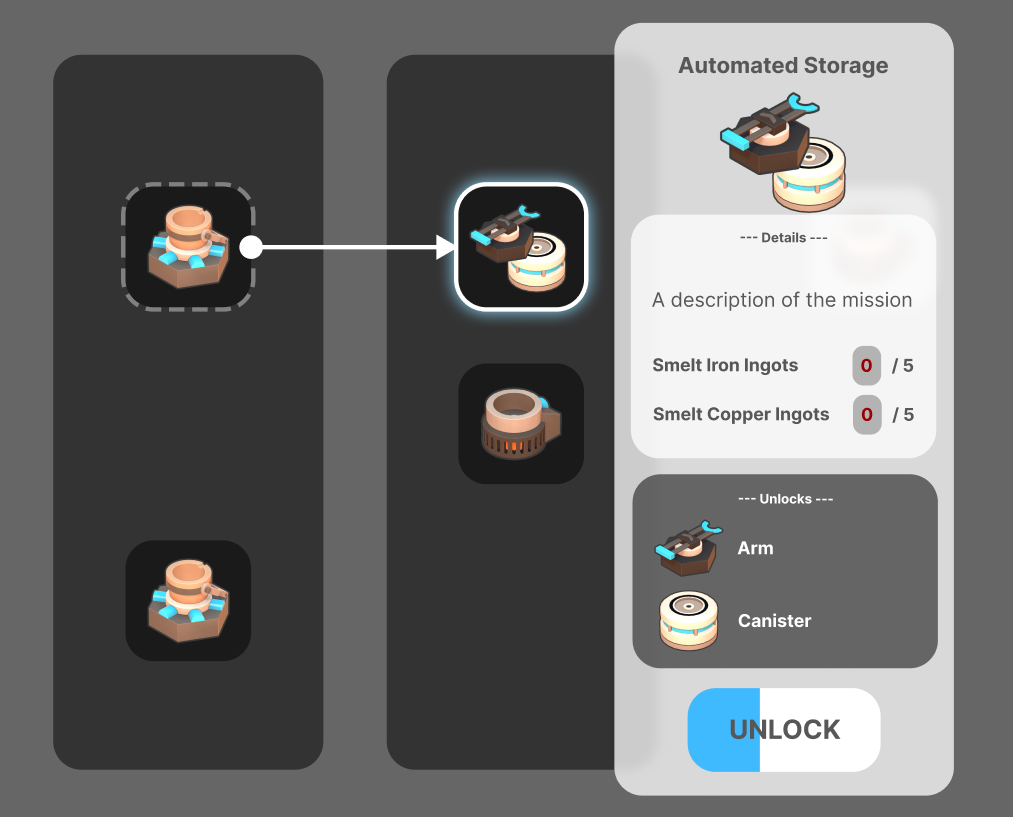
- Changed mission Unlock button to say “Claimed” on claimed mission details and changed completed mission browser cell colors
- Added stubs in mission browser for early game missions
- Changed mission browser to highlight all arrows of selected mission's ancestry in mission browser, adjusted visual style of connections to be pixel-perfect